User guide
User guide for Yggio
Create an account in Yggio
How to create your account
-
Open Yggio webpage (beta.yggio.net) in your browser
-
Press the ”Create an account” button
-
Enter a new username and password and check the Accept Terms and Policy box
-
OPTIONAL: Select the visibility of your account, making your account visible or invisible for other users
-
Press the "sign up" button to create your new account
Control Panel V2
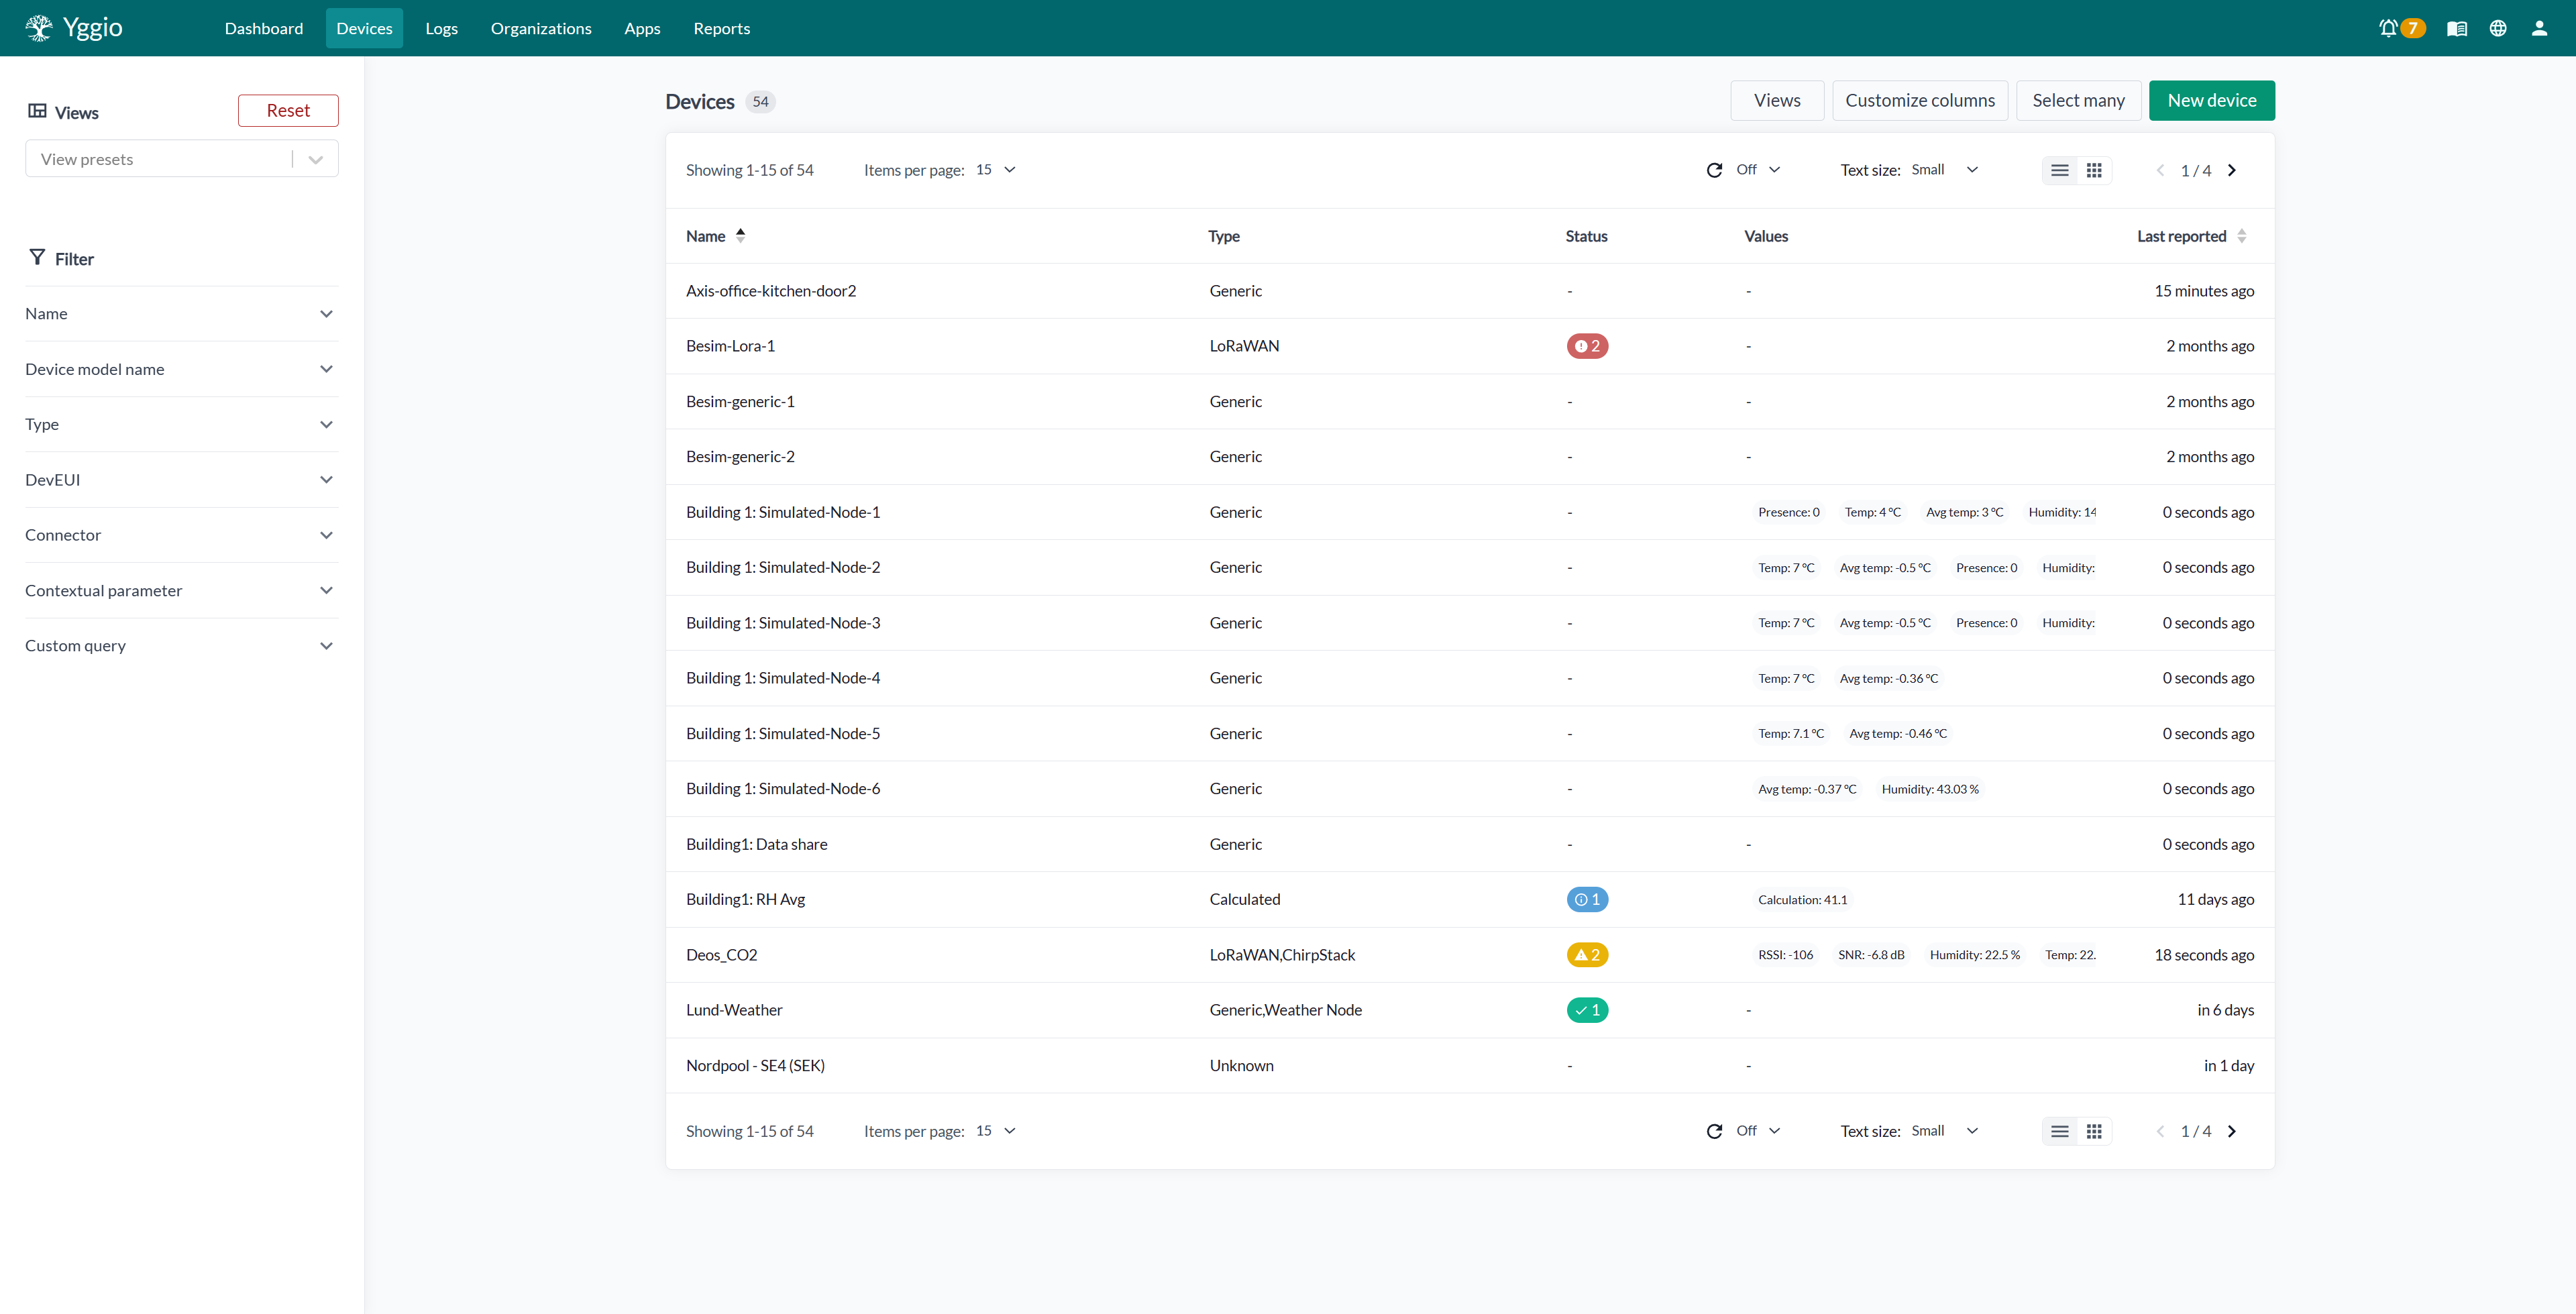
Adding devices to Yggio
How to connect a LoRa device (Single mode)
-
Navigate to "Devices" from the menu bar at the top
-
Click on "New device" then "Single mode"
-
In the "Select device type..." drop down, choose LoRaWAN, then hit "Continue"
-
In the next step you are prompted to select a connector which is a link to a LoRa Network Server such as Chirpstack, TTN, Netmore etc. Select the connector that applies to your device
-
Once a connector has been chosen, a new drop down is introduced that allows you to select "Activation Type", "OTAA" or "ABP". Choose the type that applies to your device
-
Fields to enter device keys are now visible as well as other required information. Which fields are required in your case depends on the LoRa Network Server application
-
If you wish to decode your device's payload, select the mode name that is used for your device. This field can be left empty and changed later on
-
In the next step you can add additional translators, once you're done, hit "Continue"
-
The final step "Details" lets you set a name for your device, as well as a description. If you want to add your device to a specific Location (Location Manager), you can do so here. You can also add contextual parameters. When ready, click on "Add device"
-
The last page "Result" will let you know if your device was added successfully or if problems were encountered
How to connect a LoRa device (Batch mode)
-
Navigate to "Devices" from the menu bar at the top
-
Click on "New device" then "Batch mode"
-
Upload your csv batch file by dragging and dropping it onto the grey box or click on the grey box and select your file on your computer. If you need information on how to create a batch file, click on the link "What should I put in the file?"
-
When the file has been uploaded, you will be notified if the file is valid or not. If the file is valid, press "Continue" to proceed
-
In the next step, the amount of devices to be installed will be displayed, if the information is correct, click on "Start installation"
-
After the installation has finished, information about the result is shown. In case of errors, download the errors file to troubleshoot. To exit the Batch installer, hit "Done"
Control Panel V1
Navigate to Control panel
-
Log in to your account
-
After you have logged in you should be directed to the Control panel
Adding devices to Yggio
How to connect an ICPE Z-Wave gateway to Yggio:
-
Login to Yggio with your username and password
-
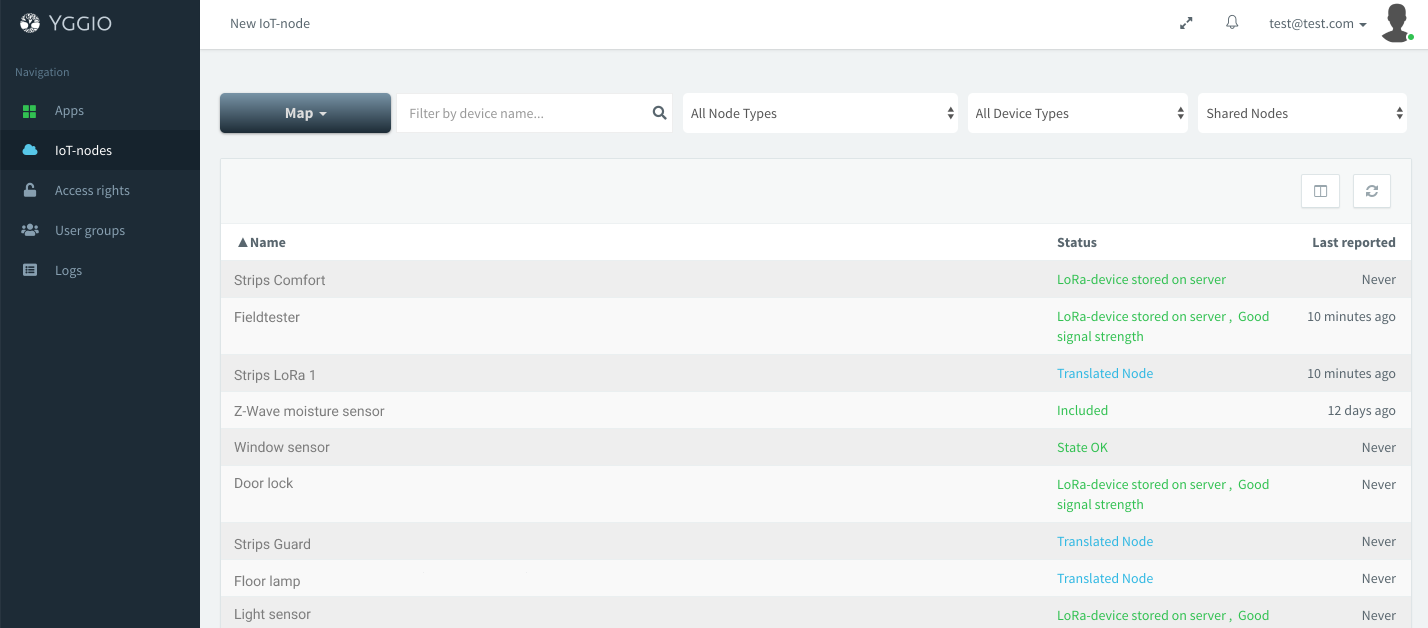
Navigate to IoT-nodes on the left side
-
Press the New IoT-Node button in the top left corner
-
Choose Z-Wave Gateway
-
Enter the Z-Wave Gateway Mac-address (Provided on bottom of ICPE) and press next
-
Give the Gateway a name and press Next
-
On Manage access rights press Next
-
On Overview press Save
-
You should be able to see your device if you filter for Z-wave gateway or search for the name it was given
-
Check if the gateway status is ”Gateway online”
How to include/exclude a Z-Wave device:
-
Locate your newly added Gateway in the IoT-node tab with filtering by Z-wave gateway
-
Press on your Gateway to open viewing popup window
-
Navigate to Z-wave include/exclude tab
-
Change mode to exclude with the crossing arrows
-
Press ”Start exclude”
-
Trigger the device for include/exclude
-
Confirm that you get a message saying your device is successfully excluded
-
Change mode to include with the crossing arrows
-
Press ”Start include”
-
Trigger the device for include/exclude
-
Confirm that you get a message saying your device is successfully included
-
Enter a name for the newly included device node
-
Save the device and close the popup window
How to connect a LoRa device:
Yggio supports several different LoRa integrations. For every integration, there needs to be a Connector created so that each LoRa device added can be connected to respective integration. If you already have a Connector set up, you can skip to step 4 for every new LoRa device you wish to connect.
-
Navigate to ”New IoT-node” on top left corner
-
Select device type ”ChirpStack Connector”
-
Fill in the necessary details provided by the chosen Lora integration
-
Once the Connector has been created, repeat step 1 then skip to step 5
-
Select device type ”LoRa”
-
Select which Connector (integration) you want to use
-
Select type “OTAA” or “ABP” as type, depending on your device
-
Enter device ID (devEui)
-
Enter Device Address (devAddr) (ONLY ABP)
-
Enter Network Session Key (nwkSKey) (ONLY ABP)
-
Enter Application Session Key (AppSKey) (ONLY ABP)
-
Enter Application Key (appKey)
-
Go to Step 2 (Details in tour guide) by clicking Next
-
Enter a suitable name for your device
-
Select correct model name (translator for your device)
-
Go to Step 3 (Manage Access on tour guide) by clicking Next
-
Go to Done step by clicking Next
-
Click on Create button to save the LoRA device
-
Find the device by filtering by “LoRa-node” or search for the given name
-
Click on the device name to open device popup window
-
Read the device manual for instructions on how to connect your device
-
When you have connected your device, press the refresh button in the top right corner of the popup window
-
Check the status of the device. Confirm that the device is reporting and is connected with a LoRa gateway. Please note that some devices can take a few minutes or more until they report data.
User groups
Navigate to User groups
-
Log in to your account
-
Click on ”User groups” on the left sidebar
Create a user group
-
Press the “New” button on the top left corner
-
Enter your group name in the box
-
Press the “Add” button
Add users
-
Press the “Manage” button in the top left corner
-
Find the group you created in the filter box
-
Select your group
-
Enter an existing user in the “Add member to group” field box
-
Press the “Add” button next to the field box
Access rights
Navigate to Access rights
-
Log in to your account
-
Click on ”Access rights” on the left sidebar
Give access rights to users and groups
-
Enter a user or group name in the “Enter username or group name here” field box
-
Press the “Select” button next to the field box
-
Give out access rights for a specific device in the list by pressing on the “Read” and “Write” buttons on the right side next to the device names
-
To give our access rights for many devices, press on the “All”, “Read” and “Write” buttons on the right side above the list
Location Manager
Navigate to Location Manager
-
Log in to your account
-
Click on ”Apps” on the left sidebar
-
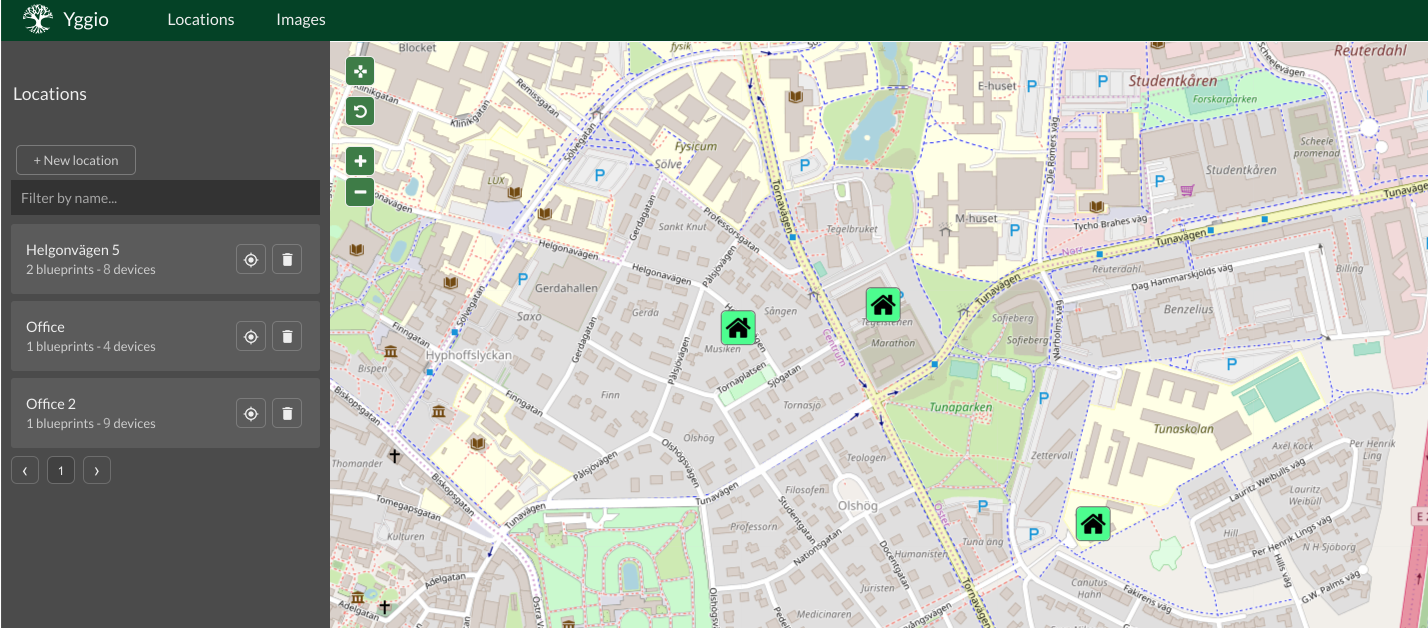
Click on ”Location Manager” to go to the Location Manager
Create a Location
-
In the Location Manager, press on the “New location” button on the left side
-
Choose a name for your new Location
-
Choose a description for your new Location
-
Enter your coordinates or press on the map to select your Location
-
Once all fields are green, hit the submit button in the bottom left
Add a Blueprint
-
Go to a Location you created by either finding it on the map and clicking on it, or in the list on the left and click on the name or aim button and press the “go to location” button on the map
-
When you are “inside” your new Location, press the “New Blueprint” button on the left side
-
Choose a name for your new Blueprint
-
Select and/or upload a Blueprint of your new Location
-
Press the “Create Blueprint” button on the bottom left
Add a device (in Location Manager)
-
Go to a Location you created by either finding it on the map and pressing on it, or in the list on the left and press on the name or aim button and “go to location” button on the map
-
On a Blueprint, click on the “Arrow” button next to the “Pen” button
-
Click on “Add device”, and a dropdown menu will appear
-
Choose the device you want add to the Blueprint
-
Press the “+” button on the Blueprint list
-
On the “Crosshair” button on the map, a red label with your unplaced device should appear
-
Press the “Crosshair” button and then click on the Blueprint to place the device at the same position as the mouse click
-
Adjust the position of the device by dragging it to the desired spot
-
Press on the “Crosshair” button again to go back to the Blueprint
Rule Engine
Navigate to Rule Engine
-
Log in to your account
-
Click on ”Apps” on the left sidebar
-
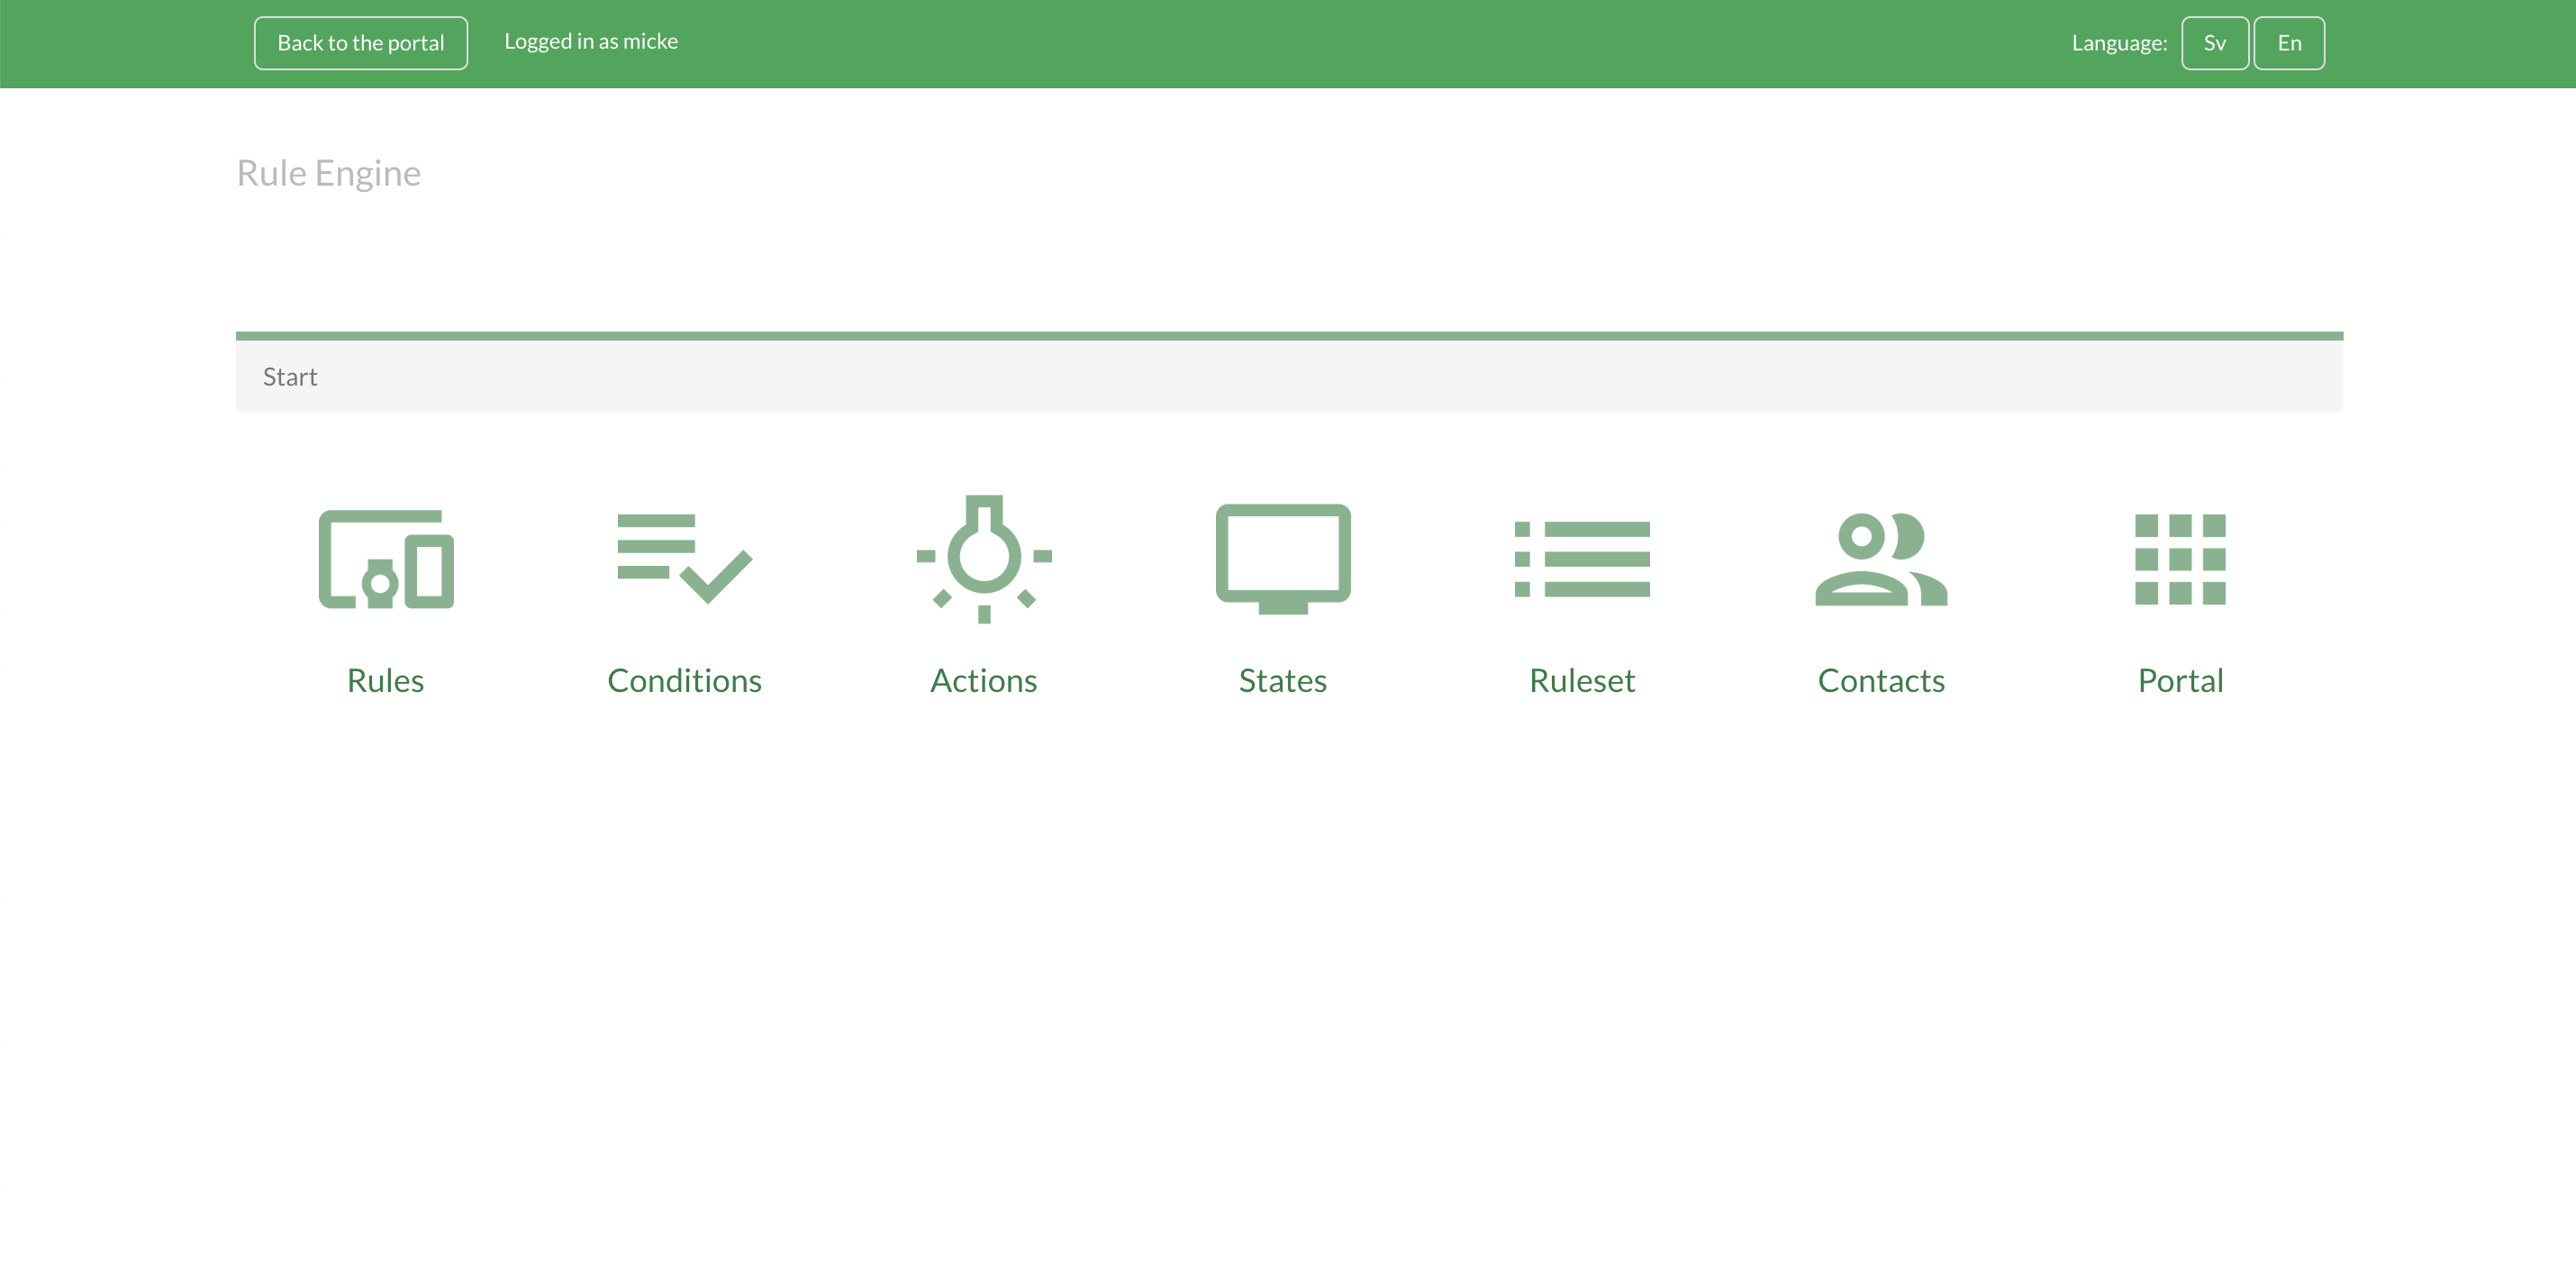
Click on ”Rule Engine” to go to the rule engine
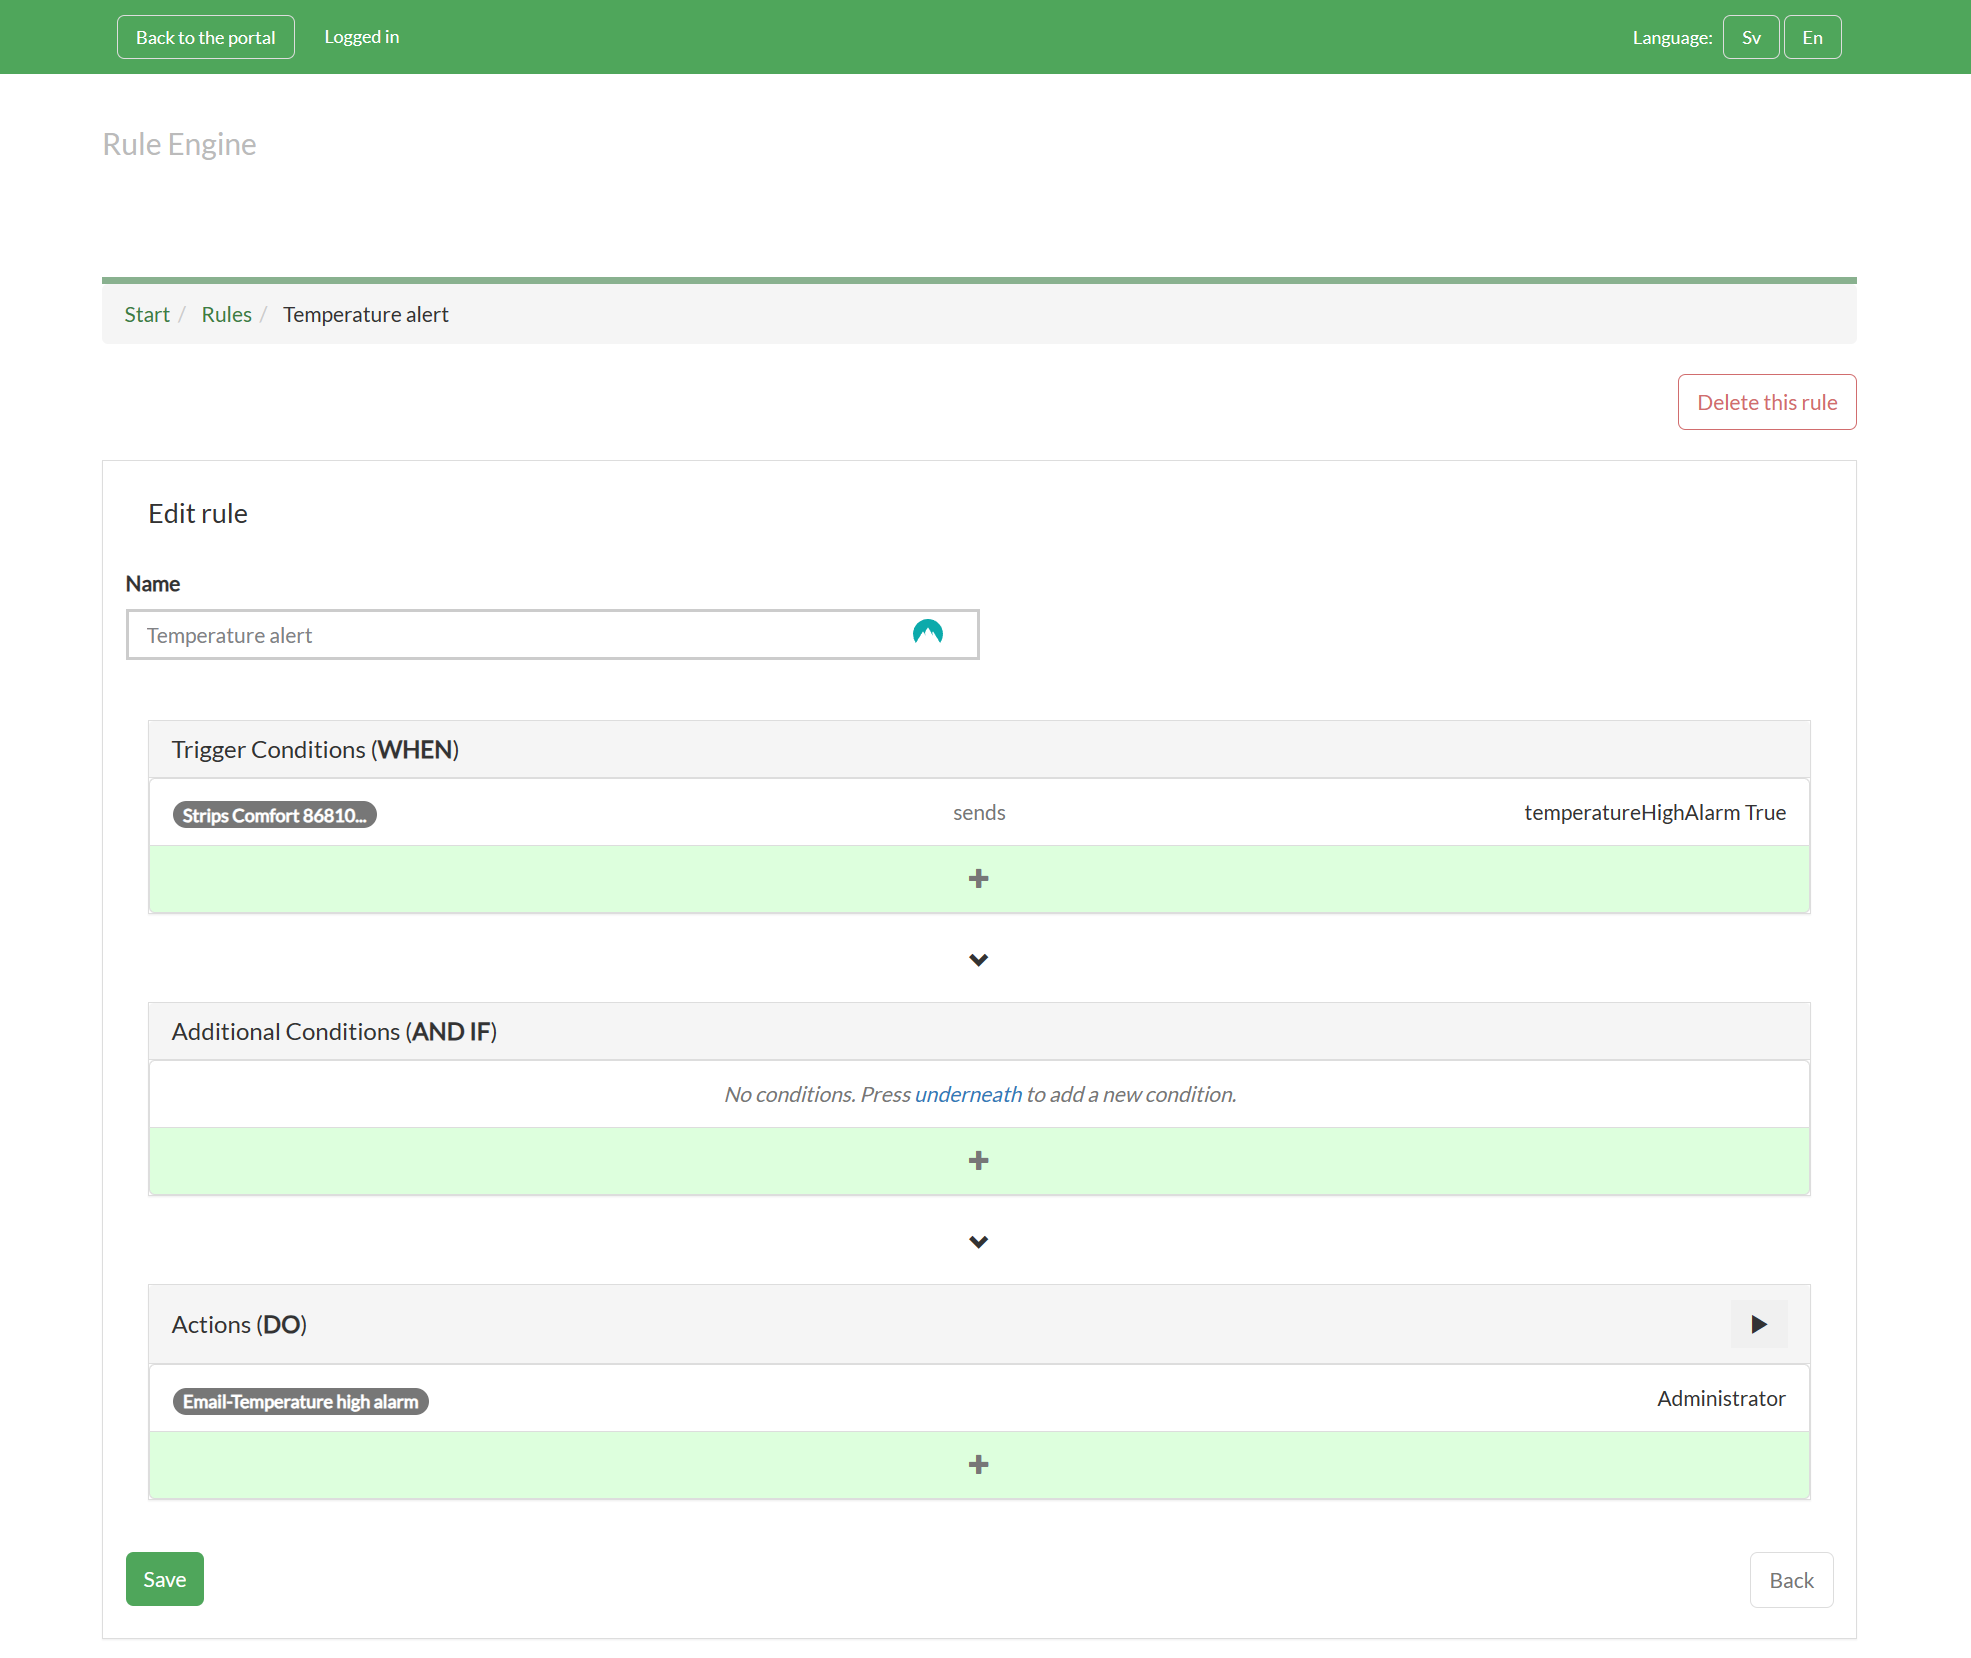
Create a Rule
-
Click on the ”Rules” icon in the Rule Engine
-
Select ”Add Rule” on the middle left side
-
Enter Rule name
-
Choose a WHEN trigger. This function defines when something is being done. Enter your values and press on the ”+” button in the middle
-
OPTIONAL: Choose an IF condition. This function will trigger an Action IF something happens. Enter your values and press the ”+” button in the middle
-
Choose a DO Action. This function will do something once the WHEN and IF conditions are met. Enter your values and press the ”+” button in the middle
-
Press on ”Add Rule” in the bottom left side
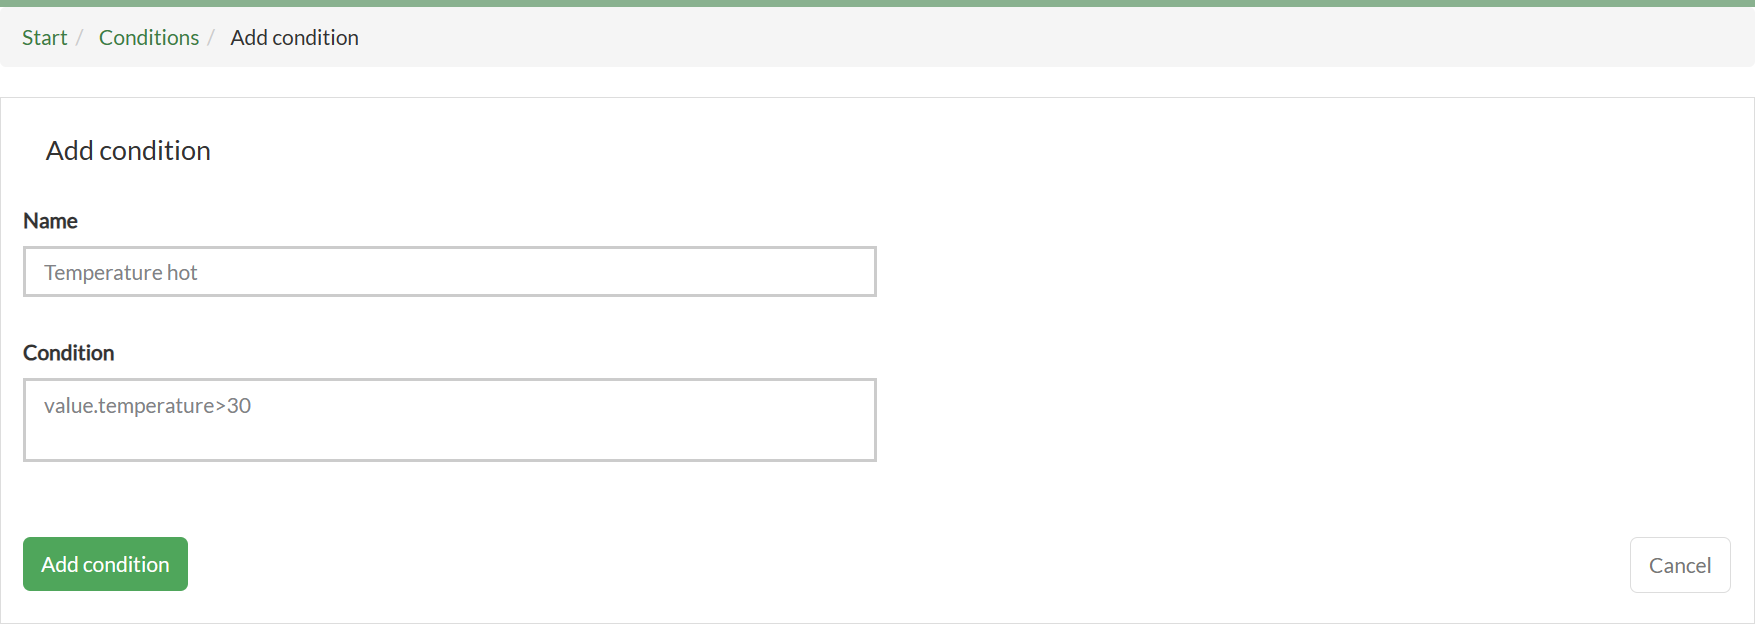
Create a Condition
-
Click on the ”Condition” icon in the Rule Engine
-
Select ”Add Condition” on the middle left side
-
Enter your Conditions Name
-
Enter your Conditions value. This function will use the value entered as the trigger
-
Press the ”Add Condition” button on the left side
Permitted operators: Permitted operators can be found here
Permitted data types: Integer, Decimal, Boolean, String
Examples:
value.statement === true && message === 'Missing expected report'
value.temperature < 39.5 || presence === false
Create an Action
-
Click on the ”Action” icon in the Rule Engine
-
Select ”Add Action” on the middle left side
-
Enter your Actions name
-
Choose what type of Action you need and select it
-
Enter correct values for your Action
-
Press the ”Add Action” button on the left side
Create a Contact
-
Click on the ”Contacts” icon in the Rule Engine
-
Press the “Add Contact” button
-
Enter name, e-mail and phone number
-
Press the “Add contact” button in the bottom left
Generic integration
Nodes which are not currently supported by Yggio can be made available through the generic integration.
Generic devices are identified by a globally unique id. There are a number of properties that can be chosen as the holder of you id.
Currently supported identifiers:
| IdentifierName | Description |
|---|---|
| id | Fiware entity id |
| secret | String between 8 and 128 characters, include only A-Z, 0-9, -, . and _ |
| devEui | 64-bit globally-unique Extended Unique Identifier (EUI-64) |
| gatewayEui | 64-bit globally-unique Extended Unique Identifier (EUI-64) |
| imei | International Mobile Equipment Identity, 15 digit number |
| tag | any string |
| serialNumber | any string |
There are two actions that needs to be performed, in any order:
-
Create the node through the control panel (or API, it follows Adding devices to Yggio)
1.1 Login to Yggio with your username and password
1.2 Navigate to IoT-nodes on the left side
1.3 Press the New IoT-Node button in the top left corner
1.4 Choose Generic
1.5 Enter the unique id to be used for this device and press Next
1.6 Give the node a name and press Next
1.7 If everything looks OK, press Create, then Finish -
Send data to the integration, either by using HTTP or MQTT.
For MQTT, see MQTT Broker.
For HTTP, a message should be sent to<server>/http-push/genericwith this format:
{
  <identifierName>: <identifier>,
  "basically": "any",
  "json": "compatible",
  "information": [1]
  "stuff": {
    "nested": "is allowed"
  }
}
The request must also include either a header or querystring that determine your identifier: identifier=<identifierName>
An example:
curl -sS https://beta.yggio.net/http-push/generic?identifier=secret \
-H 'content-type: application/json' \
-d @- <<EOF
{
  "secret": "ABCDEFGHIJKL_1234567890",
  "basically": "any",
  "json": "compatible",
  "information": [1],
  "stuff": {
    "nested": "is allowed"
  }
}
EOF
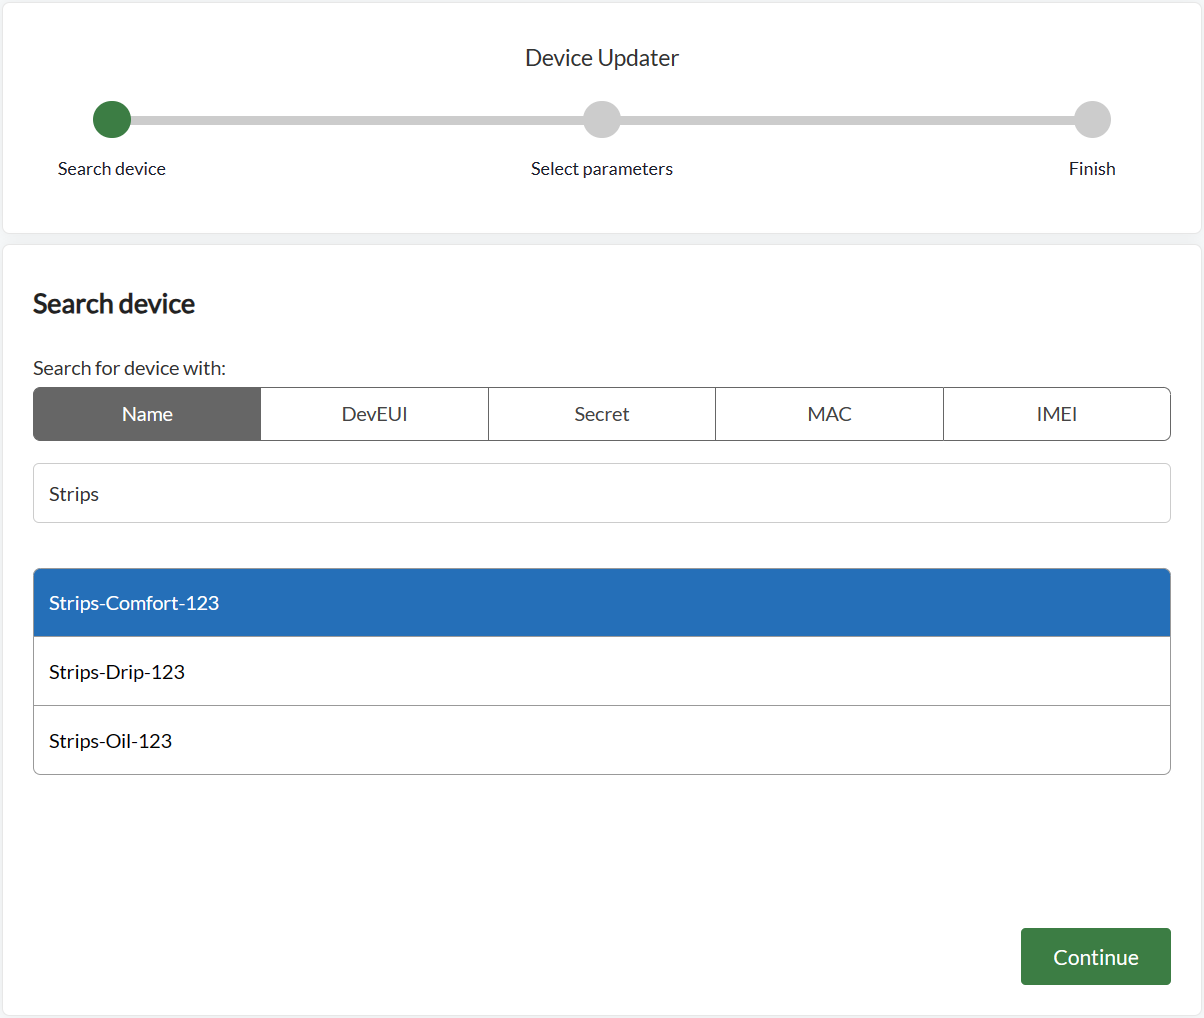
Device Updater
1. Start by searching for the device you wish to update. Keep in mind that the search is case-sensitive, so include capital letters where necessary. The lower box will display any matching results and allow you to select your device from the list. Once you have selected your device, press 'Continue.'
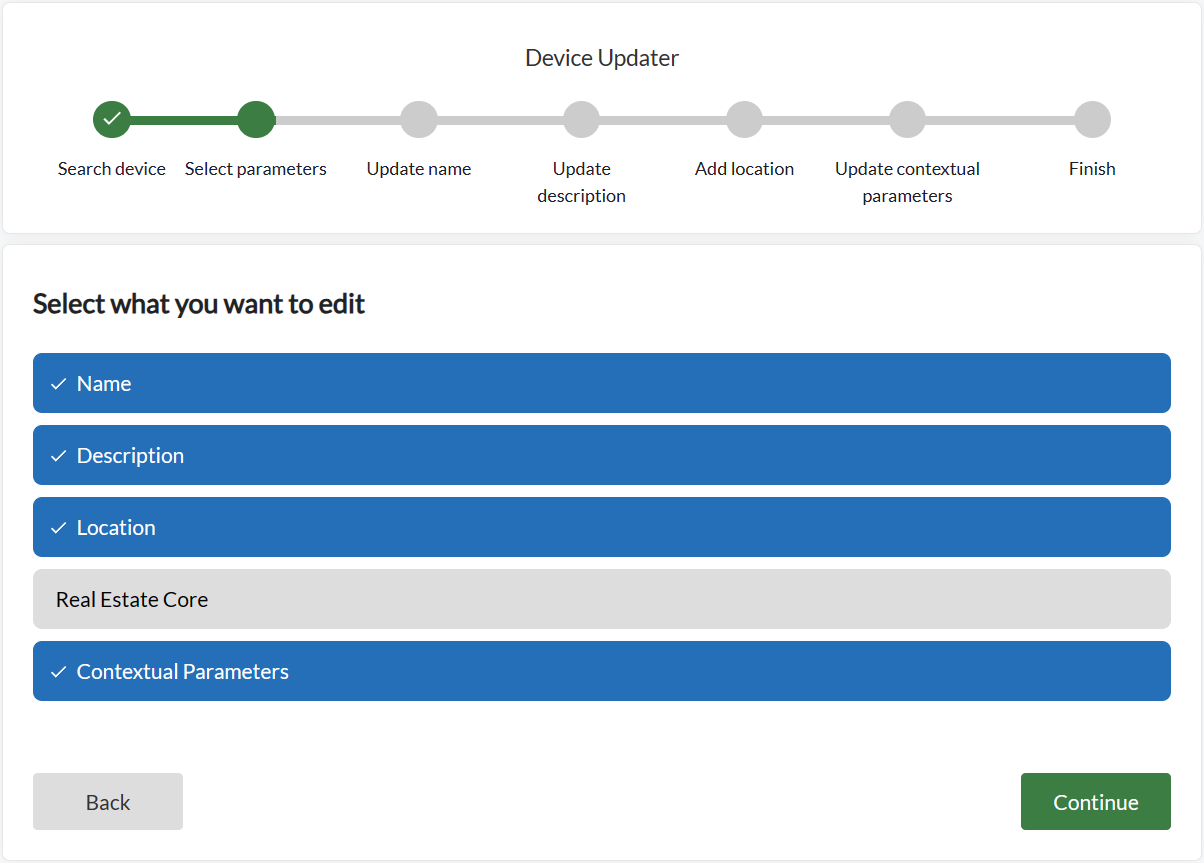
2. Next, you will be able to choose which parameters to update. You can select multiple parameters here. Click 'Continue' to proceed.
3. You will now be prompted to edit all the parameters chosen in the previous step. After you have made your changes, click 'Continue' to proceed to the next parameter.
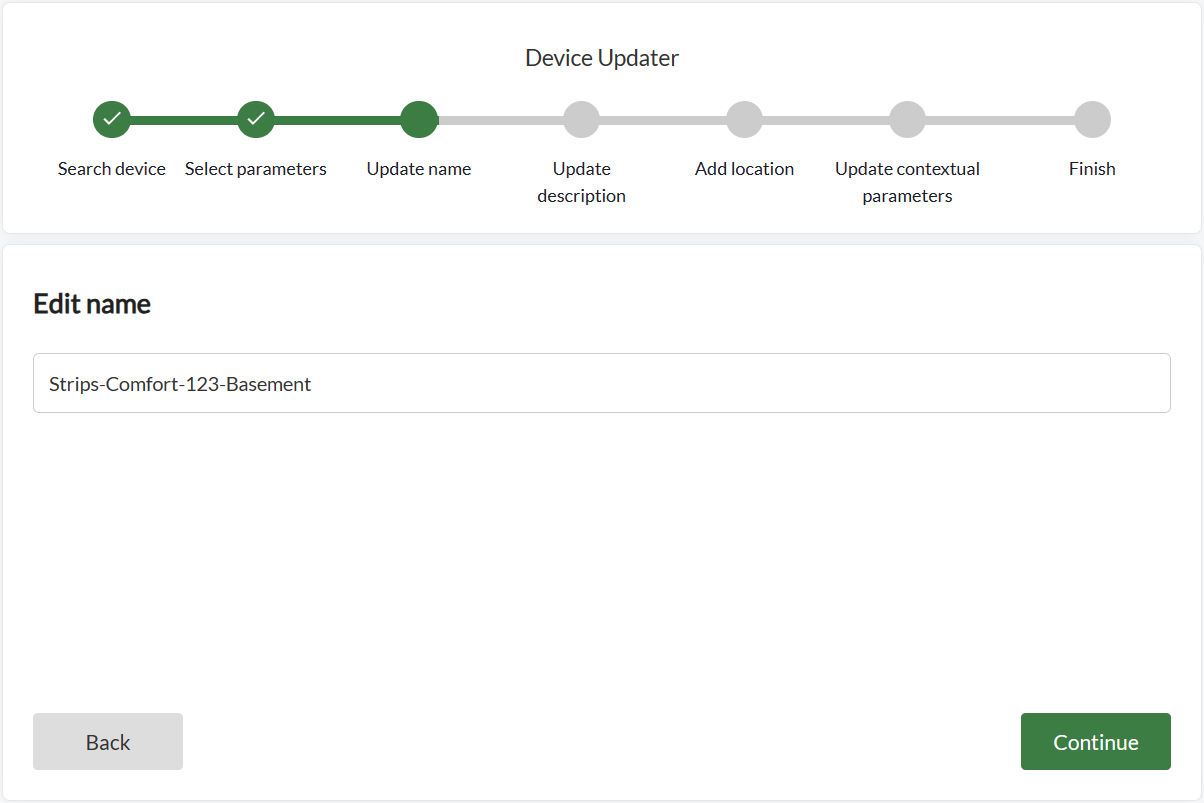
4. Once all the steps have been completed, click "Update another device" or close the window.
Logs
In logs you will find a history of all events occurring in your account including device updates, alarms, access rights, edits, downlinks and more.
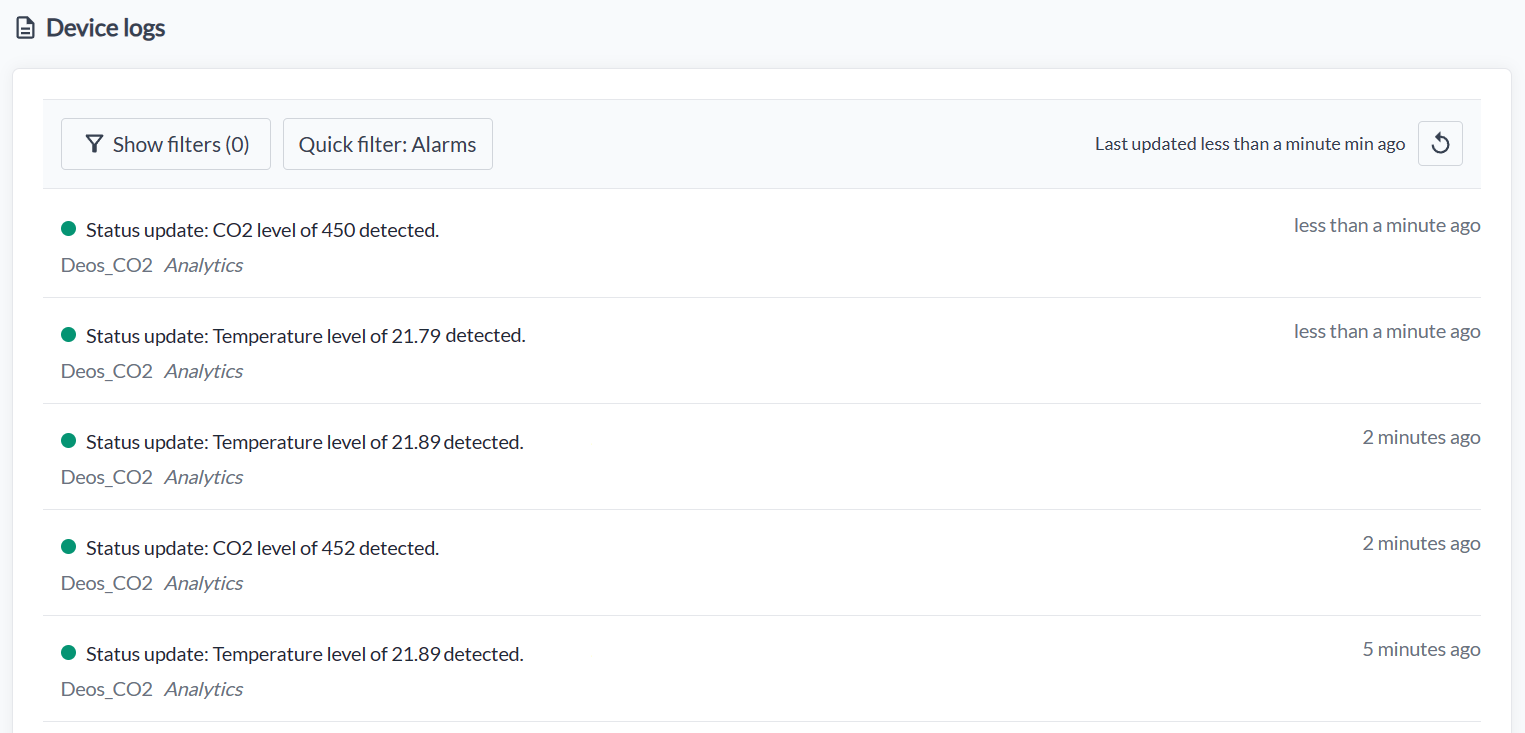
Filters
To ease monitoring efforts, a filter is available. The following filters can be used:
Type
- Error: Error conditions detected, e.g. system tried to execute a command but failed to get response in time or a device failed to report in time
- Warning: Typically low signal strength or some other sensor related issue such as an intrusion detection. Severity of the warning can be deduced from the priority
- Info: Basic log
Priority
- Low: Notification: NO. Most log events that are low severity will use this.
- Medium: Notification: NO. Any possible action can be delayed, nothing serious will happens even if no action is taken.
- High: Notification: YES. Typically this will be a serious warning that requires fast actions.
- Severe: Notification: YES. Something serious has happened that requires urgent attention (typically risk for fires, explosions, etc).
Category
- Status: General e.g. alarms, state, external errors
- Update: Update of a node
- Command: Downlinks
- Access: Access rights granted e.g. account x granted read access to user y
- Analytics: Device updates when new data is reported
- Rule: Rule Engine related events
Message
- Input unrestricted text relevant to your search.
Alarms
Alarms fall under the 'Status' category and are consistently accompanied by a 'Verify' button. It is essential to understand that verifying an alarm is a prerequisite for its reactivation. Failing to meet this requirement may lead to overlooked alarms.
