Reports
The Reports Model is a powerful Node.js module designed to streamline the management of reports within your application. It provides a robust framework for creating, updating, scheduling, and generating reports. In this documentation, we will guide you through the key functionalities of the Reports Model using the provided endpoints.
ReportBase
Through our REST-api you can send requests such as creating/updating/fetching/deleting reportbases and reportschedules. This documentation is designed to compliment our swagger documentation and the url is beta.yggio.net/api/report-bases/ and beta.yggio.net/api/report-schedules/.
It's recommended to use our interactive api https://beta.yggio.net/swagger for this.
These endpoints provide comprehensive control over your reports within the Reports Model. Use them to create, modify, and schedule your reports, ensuring efficient management and automation of your reporting processes.
Create a Report Base
To create a new Report Base, perform a POST request to the /report-bases endpoint with the following JSON payload in the request body:
-
HTTP Method: POST
-
Endpoint:
/report-bases -
Function:
Creates a ReportBase
{
  "name": "Test Report",
  "description": "test desc",
  "fileName": "testFileName",
  "secondsBetweenPoints": 3600,
  "sources": [
    {
      "valueFunction": "sum",
      "query": "contextMap.Asset Type:Pickup Point",
      "includeOnly": ["value_arrivals", "value_departures"]
      "queryParameters": [
        {
          "field": "contextMap.City",
          "name": "City",
          "options": [
            "Copenhagen",
            "Stockholm",
            "Berlin"
          ],
          "isRequired": true
        }
      ],
      "fields": [
        {
          "name": "value_arrivals",
          "prettyName": "Arrival",
          "dataType": "float"
        },
        {
          "name": "value_departures",
          "prettyName": "Departure",
          "dataType": "float"
        }
      ]
    }
  ]
}
In this example, we perform a POST request to create a Report Base. The request body contains the configuration for the Report Base. Here's an explanation of the JSON attributes:
- name: The name of the report base, in this case, "Test Report."
- description: An optional description for the report base, set as "test desc."
- fileName: The name of the templated file in our one-drive, "testFileName" in this case.
- secondsBetweenPoints: The interval (in seconds) between data points in the report, set to 3600 seconds (1 hour).
- sources: An array of data sources used to retrieve and process data for the report. In this example, it includes a single data source:
- valueFunction: The function used to process data, set to "sum."
- query: The query to filter data, in this case, "contextMap.Asset Type:Pickup Point."
- includeOnly: An optional array of fields to include in the report, set to "value_arrivals" and "value_departures."
- queryParameters: Optional query parameters. See the subsection below for more info. Is an array with objects with the following fields:
- field: The path to the field in the device.
- name: What is shown to the user above the input.
- options: If you want the user to select from a list of options, those are specified here. Is an array of strings.
- isRequired: Whether the user must include it or not.
- fields: An array of fields to include in the report, each with the following attributes:
- name: The field name, such as "value_arrivals" and "value_departures."
- prettyName: A user-friendly display name for the field, like "Arrival" and "Departure."
- dataType: The data type of the field, set as "float" in both cases.
This JSON payload is sent in the body of the POST request to create a new Report Base with the specified configuration.
Query Parameters
Query parameters are additional parameters that is added to the query. The query parameters are specifed in the report base and the values can the be included by the user when generating the report. For example, if you want to filter on a specific city, you can add a query parameter with the field contextMap.City. The user will then be able to select from a list of options, and the query will be updated to include the selected city.
Update a Report Base
If you need to modify an existing Report Base, use the following endpoint:
-
HTTP Method: PUT
-
Endpoint:
/report-bases/:reportBaseId -
Function:
Updates a reportbase
This endpoint enables you to change the configuration of your report base and update the report generation settings.
Delete a Report Base
To remove a Report Base, you can use the following endpoint:
-
HTTP Method: DELETE
-
Endpoint:
/report-bases/:reportBaseId -
Function:
Deletes a reportbase
This action removes the report base configuration and stops the associated report generation.
Retrieve a Report Base
To fetch the details of a specific Report Base, you can use the following endpoint:
-
HTTP Method: GET
-
Endpoint:
/report-bases/:reportBaseId -
Function:
Fetches a reportbase
This allows you to retrieve the report base configuration and check the report generation status for a particular Report Base.
Generate a Report Base
To generate a specific Report Base, you can use the following endpoint with the following JSON payload in the request body:
-
HTTP Method: POST
-
Endpoint:
/report-bases/:reportBaseId/generate -
Function:
Generates a reportbase
{
  startTime: 1697016949000, // Unix timestamp in milliseconds
  endTime: 1697016949000 // Unix timestamp in milliseconds
}
ReportSchedule
Create a Report Schedule
To create a new Report Schedule, use the following endpoint:
-
HTTP Method: POST
-
Endpoint:
/report-schedules -
Function:
Creates a report schedule
{
  "reportBaseId": "associated-report-base-id",
  "name": "Schedule Name",
  "interval": "daily", // Options: "monthly", "weekly", "daily" - How often to generate and send the report
  "duration": "week", // Options: "month", "week", "day", or a number - How far back in time the data stretches
  "email": {
    "to": "<Contact Id>", // ID from a Contact in the database.
    "cc": "cc@example.com", // Optional
    "title": "Report Title",
    "message": "Additional message text" // Optional
  }
}
In this JSON request body, you provide the configuration for a new Report Schedule based on the provided schema. Here's an explanation of the attributes:
- reportBaseId: The ID of the associated Report Base.
- name: A name for the Report Schedule.
- interval: Specifies how often the report should be generated and sent. Options are "monthly," "weekly," or "daily."
- duration: Defines how far back in time the data should cover. Options include "month," "week," "day," or you can specify a number.
- email: Email configuration for sending the report, including:
- to: ID from a Contact in the database.
- cc: An optional email address for carbon copy.
- title: The title of the report in the email.
- message: An optional additional message to include in the email.
This JSON payload is sent in the body of the POST request to create a new Report Schedule with the specified configuration. Use this feature to automate report generation and delivery according to your desired schedule.
Update a Report Schedule
If you need to modify an existing Report Schedule, use the following endpoint:
-
HTTP Method: PUT
-
Endpoint:
/report-schedules/:reportScheduleId -
Function:
Updates a report schedule
This endpoint enables you to change the schedule parameters and update the automated report generation settings.
Delete a Report Schedule
To remove a Report Schedule, you can use the following endpoint:
-
HTTP Method: DELETE
-
Endpoint:
/report-schedules/:reportScheduleId -
Function:
Deletes a report schedule
This action removes the schedule parameters and stops the automated report generation associated with a specific Report Schedule.
Retrieve a Report Schedule
To fetch the details of a specific Report Schedule, use the following endpoint:
-
HTTP Method: GET
-
Endpoint:
/report-schedules/:reportScheduleId -
Function:
Fetches a report schedule
This allows you to retrieve the schedule parameters and check the automated report generation status for a particular Report Schedule.
Generate a report
Generating a report using the Reports Model is a straightforward process. In this guide, we'll explain how to generate a report using a Report Base.
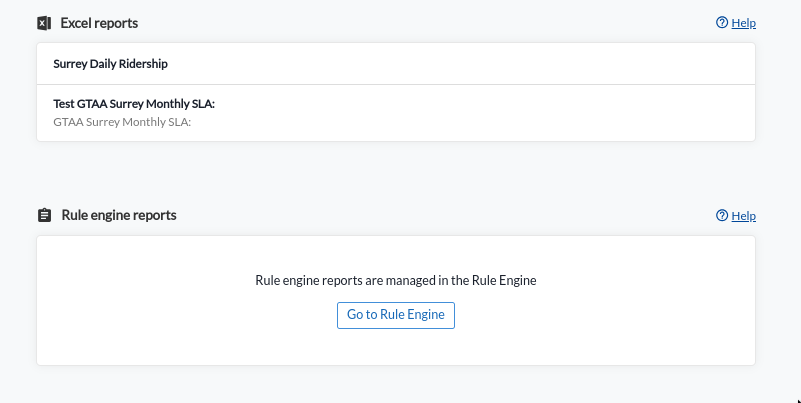
Step 1: Access the Reports Section
- Navigate to the "Reports" section in the User interface

Step 2: Select a Report Base
- Within the "Reports" section, you will see a list of all the Report Bases that you have created. Click on the Report Base for which you want to generate a report.
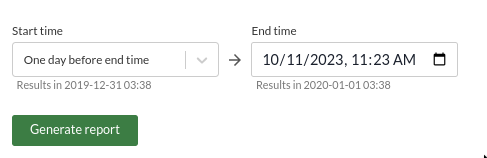
Step 3: Choose Your View
-
Once you access a specific Report Base, you'll have three available views:

-
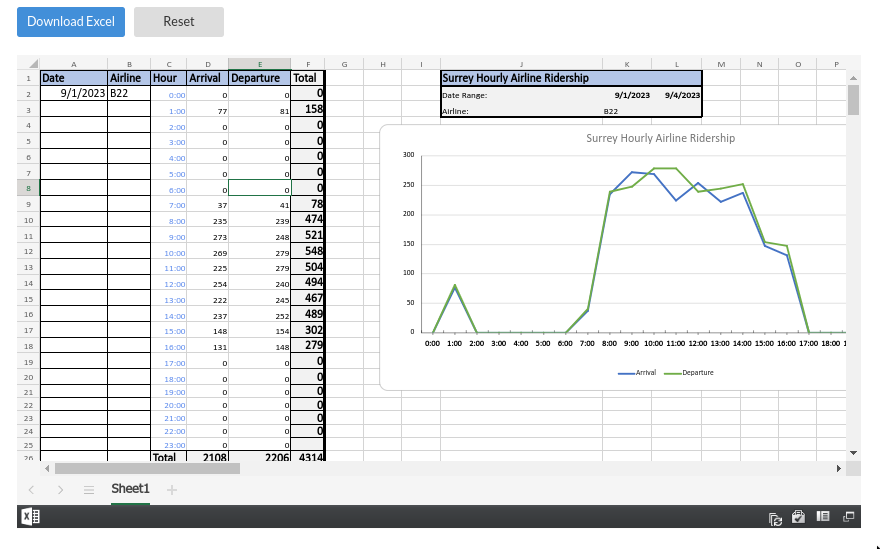
Generate: In this view, you can choose the start and stop time for your report. After selecting the time frame, click the "Generate" button. After a short processing time, you will be presented with a live preview of the generated report. You can then download the Excel file with a simple click.
-
Schedule: This view allows you to create a Report Schedule associated with the current Report Base. Essentially, this is similar to performing a
POST /report-schedulesaction programmatically.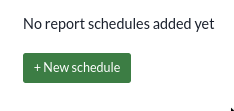
-
Advanced Info: In this view, you can access the JSON representation of the current Report Base, providing you with detailed information about its configuration.

By following these steps, you can easily generate reports based on your Report Base configurations. Enjoy streamlined reporting and data analysis with the Reports Model!